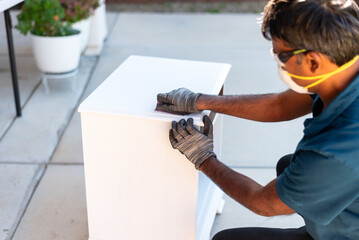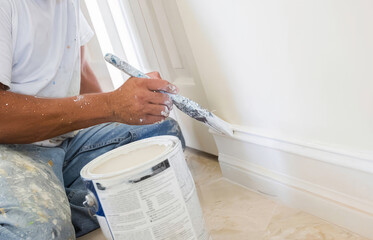
Residential Painting Options: A Complete Guide to Colors, Finishes, and Techniques

painting

A fresh coat of paint can make a familiar home feel completely new. Without replacing furniture, tearing down walls, or committing to a major renovation, residential painting can brighten dark rooms, improve curb appeal, protect valuable surfaces, and give each space a more intentional personality. The challenge is that painting involves more choices than simply selecting a favorite color. Homeowners must also consider paint type, finish, durability, surface preparation, application method, and long-term maintenance.

Understanding the available residential painting options makes it easier to create a home that looks attractive and functions well. The best option for one room may not work for another because moisture, sunlight, traffic, and cleaning requirements vary throughout a property. By considering these conditions before painting begins, homeowners can achieve results that remain beautiful for years. Contact Stellar Painting & Remodeling for more information.

Interior Painting Options for Different Rooms

Interior painting is one of the most accessible ways to refresh a residential space. It can make small rooms feel more open, give large rooms a sense of warmth, and create a consistent design throughout the home. However, every room has different practical requirements.

Living rooms and bedrooms usually allow the greatest flexibility. Since these spaces are generally dry and experience moderate traffic, homeowners can focus primarily on color, atmosphere, and personal style. Soft neutrals can create a calm and timeless appearance, while deeper colors may provide drama and visual depth. Accent walls can also introduce bold color without overwhelming the entire space.

Kitchens require paint that can withstand grease, cooking residue, heat, and frequent cleaning. Bathrooms present similar concerns because steam and humidity can contribute to peeling, staining, and mildew. Paint products designed for moisture resistance are typically better choices for these areas.

Hallways, entryways, children’s rooms, and family rooms often receive more contact than quieter areas. Walls in these spaces may be touched, bumped, or marked regularly. A durable and washable paint can make routine maintenance easier while preserving the room’s appearance.

Ceiling paint is another important interior option. Flat white remains common because it reflects light and hides minor surface imperfections. However, ceilings do not have to be white. A ceiling painted in a soft coordinating color can make a room feel more cohesive, while a dark ceiling may create an intimate and sophisticated effect in a larger space.

Exterior Painting Options for Lasting Protection

Exterior painting has both decorative and protective purposes. It gives the property a finished appearance while helping shield siding, trim, doors, and other surfaces from moisture, sunlight, temperature changes, and general wear.

The right exterior paint depends heavily on the material being covered. Wood siding needs a flexible coating that can tolerate expansion and contraction. Masonry surfaces may require breathable paint that allows trapped moisture to escape. Metal surfaces often benefit from rust-resistant primers and coatings, while vinyl siding needs paint that can adhere properly without causing heat-related damage.

Color selection also plays a major role in exterior painting. Light colors can make a house appear larger and more traditional, while dark colors create contrast and a contemporary look. Trim, doors, shutters, and architectural details can be painted in complementary or contrasting shades to emphasize the structure’s design.

Environmental exposure should always influence the final decision. Areas receiving intense sunlight may experience faster fading, particularly with certain vibrant colors. Shaded or damp sections may be more vulnerable to mold, mildew, or algae. High-quality exterior coatings formulated for local conditions tend to provide better adhesion, color retention, and resistance to weathering.

Exterior painting also requires careful timing. Paint needs suitable temperature and moisture conditions to cure correctly. Painting during extreme heat, cold, high humidity, or wet weather can lead to uneven drying, poor adhesion, bubbling, or premature peeling.

Understanding Residential Paint Types

Water-based paint is one of the most widely used residential options. It dries relatively quickly, produces less noticeable odor than many traditional alternatives, and can usually be cleaned with soap and water. Modern water-based formulas provide good durability and are suitable for walls, ceilings, siding, and many other household surfaces.

Oil-based paint offers a smooth, hard finish and has historically been used for doors, cabinets, trim, and other surfaces that receive frequent handling. It levels well during application, which can reduce the appearance of brush marks. However, it generally takes longer to dry, has a stronger odor, and requires appropriate solvents for cleanup.

Acrylic paint is known for flexibility, adhesion, and color retention. It is frequently used for exterior projects because it can perform well under changing weather conditions. Acrylic formulas are also available for interior use, particularly where durability is a priority.

Specialty coatings address more specific needs. Moisture-resistant paint is useful in kitchens, bathrooms, and laundry areas. Stain-blocking products help cover watermarks, smoke residue, ink, and other discoloration. Low-odor and low-emission formulas may be preferred in occupied homes, especially when ventilation is limited. Floor coatings provide additional resistance to foot traffic, abrasion, chemicals, and spills.

Primer is not technically a finishing paint, but it is an essential part of many residential painting projects. It creates a stable foundation, improves adhesion, covers stains, and helps produce consistent color. Primer is particularly useful on bare materials, repaired sections, glossy surfaces, porous walls, and dramatic color changes.

Choosing the Right Paint Finish

Paint finish refers to the amount of light reflected from a painted surface. It affects not only appearance but also durability, washability, and the visibility of imperfections.

Flat paint has very little shine and creates a smooth, muted appearance. It is effective at disguising dents, patches, and uneven texture, making it a popular option for ceilings and low-traffic rooms. Its main limitation is that it may be more difficult to clean without leaving visible marks.

Matte paint is similar to flat paint but may offer slightly greater durability, depending on the formula. It creates a sophisticated appearance that works well in bedrooms, living rooms, dining spaces, and home offices.

Eggshell paint has a subtle sheen that provides a balance between elegance and practicality. It is more washable than most flat finishes and is often chosen for living areas, hallways, and bedrooms. Satin paint has a more noticeable glow and greater moisture resistance, making it suitable for kitchens, bathrooms, family rooms, and high-traffic spaces.

Semi-gloss paint reflects more light and creates a durable, easy-to-clean surface. It is commonly used on doors, baseboards, window frames, cabinets, and other detailed areas. Gloss paint provides the highest level of shine and can produce a striking finish, but it also emphasizes dents, brush marks, and surface irregularities. Careful preparation is especially important when using a glossy coating.

Decorative Painting Techniques and Creative Options

Residential painting does not have to involve covering every wall with one solid color. Decorative techniques can introduce texture, dimension, contrast, and visual interest.

Color blocking uses two or more colors to define areas or create geometric effects. It can help separate functions in an open room, highlight architectural features, or give a plain wall a modern identity. Painted arches and framed color sections can create focal points around beds, desks, shelves, or seating areas.

Two-tone walls provide another versatile option. A darker color may be used on the lower portion of the wall, with a lighter shade above it. This approach can add depth while helping a room maintain a balanced appearance. Chair rails or other molding can create a natural dividing line between the colors.

Textured painting techniques can give walls more character. Sponging, rag rolling, lime-style finishes, and color washing produce layered visual effects that cannot be achieved with a standard solid coat. These techniques require skill and patience because inconsistent application can make the result appear unfinished.

Murals and hand-painted details provide nearly unlimited creative freedom. They can transform children’s rooms, reading areas, stairwells, or feature walls into personalized spaces. Stencils offer a more structured way to add repeated patterns, borders, or decorative motifs.

Cabinet painting is another popular option for changing a room without replacing existing fixtures. Proper cleaning, sanding, priming, and curing are critical because cabinets receive frequent contact and must resist oils, moisture, and cleaning products.

Selecting Residential Paint Colors

Color can influence how a room feels, even when its dimensions and furnishings remain unchanged. Light shades generally make spaces feel brighter and more open, while dark colors can create warmth, intimacy, and definition.

Natural light affects the way paint appears throughout the day. A color may look warm in morning sunlight but cooler under artificial lighting at night. Testing samples on more than one wall helps reveal how the color responds to changing conditions.

Existing materials should also guide color selection. Flooring, countertops, cabinets, furniture, stonework, and fabrics may contain warm, cool, or neutral undertones. Choosing paint with compatible undertones helps the entire space feel connected.

Homeowners do not need to use the same shade in every room to create consistency. A coordinated palette can include several related colors with similar undertones. Transitions between connecting spaces should be considered carefully, particularly in open floor plans where multiple rooms are visible at once.

Personal preference remains important. Current color trends may provide inspiration, but the most successful residential palette is one that suits the home’s architecture, lighting, daily use, and desired atmosphere.

Surface Preparation and Application Methods

Even premium paint cannot compensate for poor preparation. Walls and exterior surfaces should be clean, dry, stable, and free of peeling material before painting begins. Cracks, holes, gaps, and damaged sections should be repaired to create an even foundation.

Sanding helps smooth patched areas and improves adhesion on glossy surfaces. Cleaning removes dust, oils, soap residue, and other contaminants that could prevent paint from bonding. Caulking may be needed around trim, windows, doors, and joints to produce clean lines and reduce moisture entry.

Brushes are useful for edges, corners, trim, and detailed work. Rollers cover large flat areas efficiently and can create a consistent texture when used correctly. Sprayers provide fast, even coverage on suitable surfaces, but they require careful masking and control to prevent overspray.

The number of coats depends on the product, surface condition, application method, and color change. Dark colors painted over with light shades often need additional coverage. Allowing each coat to dry properly reduces the risk of streaks, lifting, and uneven texture.

Final Thoughts

Residential painting offers options for nearly every design goal, surface type, and maintenance requirement. Homeowners can choose subtle interior updates, durable exterior protection, decorative finishes, bold accent colors, or complete transformations. The key is to match the paint type, finish, preparation process, and application method to the demands of each surface.

A thoughtful painting project improves more than appearance. It can protect important materials, simplify cleaning, influence the atmosphere of a room, and help the entire home feel more cohesive. With careful planning and suitable products, residential painting can deliver a meaningful transformation without the cost or disruption of a major renovation.
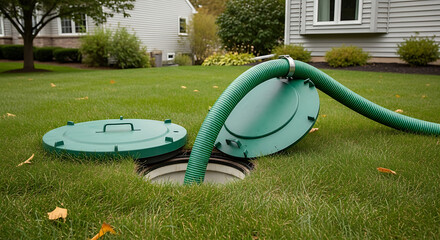

How Often Should a Septic Tank Be Pumped? Cost, Timing, and Maintenance Tips

Septic Tank services

When everything in a home is working properly, it is easy to forget about what happens beneath the ground. Wastewater quietly leaves sinks, showers, toilets, and appliances and eventually reaches the septic system. Most homeowners rarely think about the tank until unpleasant odors, slow drains, or backups suddenly appear. By that point, a neglected septic tank may already be struggling to handle the household’s wastewater. Understanding Septic Tank Pumping Fresno and knowing when it’s needed can help prevent messy problems and keep the entire system working properly.

A septic system is designed to manage wastewater on a continuous basis, but it is not maintenance free. Solid waste gradually accumulates inside the tank while liquids move through the treatment system. If too much solid material remains in the tank, it can interfere with normal operation and potentially reach areas where it should not go. Regular pumping removes accumulated sludge and helps maintain adequate space inside the tank. Proper care can also reduce the likelihood of unexpected backups and expensive septic system repairs.

How Often Should a Septic Tank Be Pumped?

The recommended pumping frequency depends on several factors, including household size, tank capacity, water usage, and the amount of solid waste produced. Many septic systems require pumping every few years, but there is no single schedule that works for every household. A smaller tank serving several people may fill with solids more quickly than a larger tank serving fewer occupants. Frequent use of garbage disposals can also increase the amount of solids entering the system. Because of these differences, the condition of the tank should be considered alongside a general maintenance schedule.

Households should also pay attention to changes in how the septic system operates. Slow drains, unpleasant odors, unusually wet areas near the drain field, and wastewater backups can indicate that the system needs attention. Waiting until a serious backup occurs is not a good maintenance strategy because the problem may already be advanced. Regular inspections can help determine how quickly solids are accumulating inside the tank. Establishing a consistent pumping routine based on actual household conditions can provide better protection than waiting for warning signs.

Why Is Septic Tank Pumping Important?

Septic tank pumping removes sludge and scum that naturally accumulate as wastewater moves through the tank. Heavy solids settle at the bottom while lighter materials form a layer near the surface. The liquid portion remains between these layers and continues through the wastewater treatment process. Over time, the solid layers become thicker and reduce the amount of space available for incoming wastewater. Pumping removes these accumulated materials and restores the tank’s usable capacity.

Neglecting pumping can allow solids to move beyond the tank and enter the drain field. When this happens, the soil responsible for treating wastewater can become clogged or overloaded. A damaged or overloaded drain field can be much more expensive to address than routine tank pumping. Regular maintenance therefore helps protect not only the tank but also the other components of the septic system. Keeping solids under control is one of the most important ways to support long-term septic performance.

What Happens During Septic Tank Pumping?

During a pumping service, trained professionals locate the septic tank and access the appropriate openings. Specialized equipment is then used to remove accumulated liquid, sludge, and floating solids from inside the tank. The process allows the interior of the tank to be emptied so its condition can be evaluated more effectively. Professionals may also look for signs of damage, unusual buildup, or other concerns while performing the service. The exact process can vary depending on the tank design and accessibility.

Pumping also provides an opportunity to identify problems before they become more serious. Cracks, damaged covers, corrosion, or unusual liquid levels may indicate issues that require additional attention. A professional can explain whether the tank appears to be functioning normally or whether further inspection is recommended. Homeowners should avoid attempting to enter a septic tank because the gases inside can be extremely dangerous. Proper pumping should always be performed with suitable equipment and appropriate safety procedures.

What Factors Affect Septic Tank Pumping Cost?

Several factors can influence the cost of septic tank pumping. The size of the tank is an important consideration because larger tanks generally require more time and equipment to service. Accessibility can also affect the work involved, particularly when the tank opening is difficult to locate or reach. The amount of accumulated material inside the tank may influence the time required for pumping as well. Additional services, such as inspection or cleaning, can also affect the overall cost.

The condition of the septic system can make a difference as well. A tank that has been maintained regularly may require a straightforward pumping service, while a neglected system may need additional attention. If the tank contains unusually heavy sludge buildup or other materials, the service may take longer. Homeowners should consider the long-term value of regular pumping rather than focusing only on the immediate expense. Preventive maintenance can help reduce the likelihood of larger repair bills caused by neglected septic systems.

What Are the Signs That a Septic Tank Needs Pumping?

One of the clearest signs of a septic problem is wastewater backing up into household fixtures. Toilets, sinks, showers, and other drains may begin operating slowly when the system cannot process wastewater efficiently. Gurgling sounds can also indicate that air and wastewater are struggling to move through the plumbing. Foul odors around drains or near the septic tank may signal that the system requires attention. These warning signs should not be ignored because they can indicate a developing or serious septic issue.

Changes around the drain field can provide additional clues. Unusually green or lush grass in one area, standing water, soggy soil, or persistent sewage odors may indicate that wastewater is not being treated or distributed properly. However, these symptoms do not always mean that pumping alone will solve the problem. A damaged component, blocked pipe, or failing drain field can create similar warning signs. Professional evaluation can determine whether the tank simply needs pumping or whether another part of the system requires repair.

How Can Homeowners Maintain a Septic System?

Good daily habits can reduce unnecessary stress on a septic system. Homeowners should be mindful of what enters household drains because many materials do not break down easily. Grease, cooking oils, harsh chemicals, wipes, paper products, and other inappropriate materials can contribute to plumbing or septic problems. Toilets should generally receive only suitable waste and toilet paper. Keeping unnecessary materials out of the wastewater system can help maintain more consistent operation.

Water conservation is another useful part of septic maintenance. Using excessive amounts of water within a short period can place additional pressure on the tank and drain field. Fixing leaking faucets, toilets, and pipes can prevent unnecessary water from entering the system. Spreading laundry and other high-water-use activities throughout the week can also help manage the wastewater load. Combined with regular inspections and pumping, responsible water use can support the long-term performance of a septic system.

Final Thoughts

Septic tank pumping is an important part of maintaining a healthy and functional wastewater system. Although pumping schedules vary depending on household conditions, regular service helps control the buildup of sludge and scum inside the tank. Recognizing warning signs such as slow drains, odors, backups, and wet areas can help homeowners respond before a minor concern becomes a major problem. Good maintenance habits, responsible water use, and professional inspections can further reduce unnecessary stress on the system. By treating septic tank care as routine maintenance rather than an emergency service, homeowners can protect their plumbing, drain field, and property for years to come.

How Much Does Water Heater Repair Cost? Common Problems, Solutions, and What to Expect

Imagine stepping into the shower expecting warm, relaxing water, only to be hit with an icy stream. A water heater problem can quickly turn an ordinary morning into a frustrating experience. Whether the water isn’t heating properly, the tank is leaking, or the unit is making unusual sounds, these warning signs shouldn’t be ignored. A faulty water heater can affect comfort, increase energy use, and potentially cause water damage if the problem becomes severe. Understanding common water heater issues can help homeowners recognize when professional Water Heater Repair Castle Rock is needed.

Water heaters are essential appliances that work quietly in the background every day. Like other household equipment, they can eventually develop problems because of age, mineral buildup, worn components, corrosion, or regular use. Some issues may appear minor at first but can become more expensive when left unresolved. Learning how water heater repair works can make it easier to respond quickly when something goes wrong. Knowing the warning signs can also help homeowners make informed decisions about repair, maintenance, or replacement.

What Are the Most Common Water Heater Problems?

One of the most common water heater problems is a lack of hot water. This can happen for several reasons depending on the type of water heater installed. An electric unit may have a faulty heating element, while a gas unit could have an issue with its burner or ignition system. A malfunctioning thermostat can also prevent the water from reaching the desired temperature. When hot water disappears unexpectedly, identifying the underlying cause is important before attempting any repair.

Another frequent issue is inconsistent water temperature. Water may start hot but become cold quickly, or it may fluctuate between hot and lukewarm during use. Sediment accumulation inside the tank can reduce heating efficiency and limit the amount of usable hot water. Older components may also struggle to maintain consistent temperatures. Addressing these problems early can help restore reliable hot water and prevent additional strain on the system.

Why Is My Water Heater Leaking?

A leaking water heater should always receive prompt attention because even a small leak can eventually cause significant water damage. Leaks can develop around connections, valves, pipes, or the tank itself. Loose fittings may sometimes be corrected through a simple repair, but corrosion can indicate a more serious problem. If the tank has deteriorated from the inside, repairing the damaged area may not provide a long-term solution. In such cases, a professional inspection can determine whether repair or replacement is the more appropriate option.

The location and amount of water can provide useful clues about the source of a leak. Water around the top of the unit may suggest a problem with an inlet or outlet connection, while water near the bottom can indicate a drain valve or tank issue. A pressure relief valve can also release water when pressure or temperature becomes too high. Ignoring a leak can damage surrounding flooring, walls, or other household materials. Turning off the appropriate water and power or fuel supply when necessary can help reduce risks while waiting for professional assistance.

How Does Sediment Affect Water Heater Performance?

Sediment buildup is another common reason water heaters become less efficient over time. Minerals naturally found in water can settle at the bottom of a storage tank and create a layer between the water and the heating source. This forces the system to work harder to heat the water effectively. As efficiency decreases, homeowners may notice longer heating times or higher energy consumption. Regular maintenance can help control sediment buildup and support better performance.

Heavy sediment can also contribute to unusual noises coming from the water heater. Popping, cracking, rumbling, or banging sounds may occur as trapped water beneath the sediment heats up and escapes. These noises can be signs that the unit needs cleaning or professional attention. If sediment continues to accumulate, it can place additional stress on the heating components. Addressing buildup before it becomes severe can help extend the useful life of the water heater.

When Should You Repair or Replace a Water Heater?

Repair is often a practical option when the water heater has a limited component failure and the tank remains in good condition. Problems involving thermostats, heating elements, valves, or other replaceable components may be corrected without replacing the entire unit. The age and overall condition of the water heater should also be considered when deciding whether a repair makes financial sense. A newer unit with a minor problem may benefit significantly from a timely repair. Professional evaluation can help determine the most suitable approach.

Replacement may become more reasonable when a water heater is old, frequently breaking down, or experiencing serious tank corrosion. A damaged storage tank can be particularly concerning because the tank itself is not usually something that can be restored to like-new condition through a simple repair. Repeated repair expenses can also add up over time. Newer water heaters may offer improved efficiency and updated features that reduce operating costs. Comparing the cost of continued repairs with the expected lifespan and performance of a replacement can help homeowners make a sensible decision.

How Much Does Water Heater Repair Cost?

The cost of water heater repair can vary depending on the type of problem, the components involved, the unit’s condition, and the complexity of the work. A relatively simple issue may require only a minor part replacement and limited labor. More complicated problems can require additional diagnostic work and replacement components. The type of water heater can also affect the repair process because gas and electric systems use different components. For this reason, an inspection is usually necessary before an accurate repair estimate can be provided.

Homeowners should also consider the long-term cost rather than focusing only on the immediate repair price. A low-cost repair may be worthwhile if it restores a newer unit to reliable operation. However, repeatedly repairing an aging system may become less economical than investing in a replacement. Energy efficiency is another factor because an older unit may consume more energy than a newer model. Evaluating repair costs alongside age, efficiency, condition, and expected remaining lifespan can lead to a better financial decision.

How Can Regular Maintenance Prevent Water Heater Repairs?

Regular maintenance can reduce the likelihood of unexpected water heater problems. Checking connections, valves, temperature settings, and visible signs of corrosion can help identify potential concerns before they become major failures. Storage tank systems can also benefit from appropriate flushing to reduce sediment accumulation. Professional inspections can provide a more detailed assessment of components that may not be easy for homeowners to evaluate themselves. Consistent maintenance can improve reliability while helping the system operate more efficiently.

Maintenance is especially important as a water heater gets older. Components naturally experience wear from repeated heating cycles, water pressure, and everyday use. Small changes such as unusual sounds, slower heating, or minor leaks should not automatically be dismissed as normal aging. Taking action when these warning signs first appear may prevent more extensive damage later. A proactive approach can ultimately help protect household comfort and reduce the chance of an unexpected water heater failure.

Final Thoughts

Water heater repair can address many common problems, from inconsistent temperatures and faulty components to leaks and sediment buildup. Recognizing the warning signs early gives homeowners a better opportunity to prevent minor issues from becoming expensive emergencies. While some problems may involve straightforward component repairs, serious leaks, corrosion, or repeated failures may indicate that replacement is a better long-term choice. Professional evaluation is particularly valuable when the cause of a problem is unclear or when safety is involved. With proper maintenance and timely repairs, a water heater can provide dependable hot water while operating more efficiently for years to come.

What Is Cabinet Refinishing? Everything You Need to Know

Cabinet Refinishing

What if you could completely transform the look of your kitchen or bathroom without replacing your cabinets? Many homeowners are surprised to learn that beautiful, updated cabinets do not always require a full renovation. Over time, cabinets can become dull, scratched, or outdated, making an entire room feel worn. Cabinet refinishing offers a practical solution that restores their appearance while preserving the existing cabinet structure, making it one of the most popular home improvement options.

Understanding San Jose Cabinet Refinishing can help homeowners decide whether it is the right choice for their space. Instead of investing in brand new cabinets, refinishing focuses on renewing the surfaces you already have. With proper preparation and quality materials, refinished cabinets can look refreshed, stylish, and durable for many years. Whether your goal is to modernize your home or simply restore the beauty of your cabinetry, cabinet refinishing is a smart option worth considering.

What Is Cabinet Refinishing?

Cabinet refinishing is the process of restoring the appearance of existing cabinets by removing or preparing the old finish and applying a new stain, paint, or protective coating. Rather than replacing the cabinet boxes and doors, refinishing works with the cabinets already installed in the home. This allows homeowners to improve the overall look of their space while keeping the original cabinet structure intact. The process focuses on enhancing the surface rather than rebuilding the cabinets from scratch. It is an excellent choice for cabinets that remain structurally sound but have become worn or outdated over time.

Many people confuse cabinet refinishing with cabinet refacing, but the two are different. Refinishing improves the existing cabinet surfaces, while refacing typically involves replacing the cabinet doors and applying new coverings to the cabinet frames. Refinishing is often chosen because it preserves more of the original materials while providing a refreshed appearance. It also offers flexibility in selecting new colors or wood tones that better match changing design preferences. For homeowners looking for an updated appearance without major construction, refinishing can be an ideal solution.

How the Cabinet Refinishing Process Works

The cabinet refinishing process begins with a careful inspection of the cabinets to determine their condition. Cabinets with solid construction and only cosmetic wear are usually excellent candidates for refinishing. Before any new finish is applied, every surface is cleaned thoroughly to remove grease, dirt, and residue that may have accumulated over the years. Cabinet doors, drawers, and hardware are often removed to make the refinishing process more precise and efficient. Proper preparation lays the foundation for a smooth and durable finish.

Once the cabinets are cleaned, sanding or surface preparation begins to remove the existing finish and create a surface that allows the new coating to bond effectively. Any small imperfections, such as scratches or dents, can also be repaired during this stage. After preparation is complete, paint or stain is carefully applied in multiple thin coats to achieve an even appearance. Finally, a protective topcoat helps shield the cabinets from moisture, scratches, and daily wear. Every step contributes to creating cabinets that look refreshed and remain durable over time.

Benefits of Cabinet Refinishing

One of the biggest benefits of cabinet refinishing is its ability to dramatically improve the appearance of a room without replacing the cabinets. Because cabinets occupy a large portion of the visual space in kitchens and bathrooms, updating their finish can make the entire room feel brighter, cleaner, and more modern. Homeowners can select from a wide variety of colors, stains, and finishes to create a style that reflects their personal preferences. This flexibility allows for both classic and contemporary designs without changing the cabinet layout.

Cabinet refinishing is also an environmentally friendly option because it reduces the amount of material that ends up as construction waste. Instead of discarding cabinets that are still structurally sound, refinishing extends their lifespan and gives them a fresh appearance. This approach conserves resources while minimizing unnecessary waste. In addition, refinishing projects are generally completed more quickly than full cabinet replacement, allowing homeowners to enjoy their updated space sooner. These advantages make refinishing an appealing option for many home improvement projects.

Is Cabinet Refinishing Right for Your Cabinets?

Not every cabinet is a suitable candidate for refinishing, so evaluating their condition is an important first step. Cabinets made from solid wood or other durable materials often respond well to refinishing because their structure remains strong over time. If the cabinet boxes are sturdy and the doors function properly, refinishing may provide excellent results. Minor cosmetic issues such as faded finishes, scratches, or discoloration can usually be corrected during the refinishing process. These improvements restore the cabinets without requiring complete replacement.

However, cabinets with severe structural damage, extensive water damage, or broken components may require more than refinishing alone. In these situations, repairs or replacement may be necessary before cosmetic improvements can be made. A careful assessment helps determine the most appropriate solution based on the condition of the cabinetry. Understanding the difference between cosmetic wear and structural damage allows homeowners to make informed decisions. Choosing the right approach helps ensure the best long term results.

Choosing the Perfect Finish for Your Cabinets

Selecting the right finish is one of the most exciting parts of cabinet refinishing. Homeowners can choose painted finishes for a clean and modern appearance or wood stains that highlight the natural grain of the cabinets. Light colors often create an open and airy feeling, while darker shades bring warmth and sophistication to the room. The choice of finish can significantly influence the overall atmosphere of the space. Matching the cabinet finish with countertops, flooring, and other design elements creates a balanced and attractive interior.

The protective coating applied after painting or staining is equally important because it helps preserve the beauty of the cabinets. Durable topcoats resist scratches, moisture, and everyday wear, allowing the finish to maintain its appearance for years. Different sheen levels, such as satin or semi gloss, offer varying levels of shine and ease of cleaning. Choosing the right combination of color and protective finish ensures both visual appeal and long lasting performance. Careful selection helps homeowners enjoy beautiful cabinets with minimal maintenance.

How to Keep Refinished Cabinets Looking Their Best

Once cabinets have been refinished, proper maintenance helps preserve their updated appearance. Cleaning the cabinets regularly with a soft cloth and gentle cleaning products removes dust, fingerprints, and cooking residue without damaging the finish. Harsh chemicals and abrasive scrubbers should be avoided because they may wear away the protective coating over time. Promptly wiping up spills also prevents moisture from affecting the cabinet surface. Consistent care keeps refinished cabinets looking fresh and attractive.

It is also helpful to inspect cabinets occasionally for minor scratches or chips that may develop with regular use. Addressing small issues early helps prevent larger problems and extends the lifespan of the finish. Gentle handling of cabinet doors and drawers also reduces unnecessary wear. By following simple maintenance habits, homeowners can enjoy the beauty of their refinished cabinets for many years. Routine care protects both the appearance and durability of the investment.

Final Thoughts

Cabinet refinishing is an excellent way to restore the beauty of existing cabinets without replacing them entirely. By renewing the surface with fresh paint or stain and applying a durable protective finish, homeowners can dramatically improve the appearance of their kitchens, bathrooms, and other living spaces. The process is well suited for cabinets that remain structurally sound but have become worn or outdated over time. With proper preparation, quality materials, and regular maintenance, refinished cabinets can continue looking beautiful for many years. If you are looking for an affordable and effective way to refresh your home, cabinet refinishing is a practical solution that offers lasting value and timeless appeal.

What Areas of Your Home Are Most Vulnerable to Pests?

pest control

Pests rarely enter a home and settle in random locations. Most insects and rodents look for specific conditions that provide easy access to food, water, warmth, shelter, and protected places to reproduce. Kitchens may attract pests because of food and moisture, while basements, attics, garages, and crawl spaces can provide quiet hiding places that receive little daily attention. Even well-maintained homes can develop pest problems when small entry points or favorable conditions go unnoticed.

Understanding which areas of your home are most vulnerable to pests can help you focus prevention efforts where they are likely to make the greatest difference. Contact your local Pest Control Vero Beach expert for more details.

Why Are Kitchens Vulnerable to Pest Problems?

The kitchen is one of the most attractive areas of a home for many pests because it provides reliable access to food and water. Crumbs beneath appliances, spills inside cabinets, open food containers, pet food, and improperly stored garbage can attract ants, cockroaches, rodents, and other unwanted visitors. Even small amounts of food residue may be enough to support pest activity. Areas behind refrigerators and stoves are especially vulnerable because they are warm and rarely disturbed. Regular cleaning can help eliminate many of these attractive conditions.

Moisture makes kitchens even more appealing to certain pests. Slow plumbing leaks beneath sinks, condensation around pipes, and standing water near appliances can provide dependable water sources. Gaps around plumbing penetrations may also create convenient pathways through walls and cabinets. Homeowners should periodically inspect these hidden locations instead of focusing only on visible countertops and floors. Keeping food sealed and addressing moisture problems can significantly reduce pest pressure in the kitchen.

Why Do Bathrooms Attract Pests?

Bathrooms provide the damp conditions preferred by many insects. Water from showers, sinks, toilets, and plumbing lines can increase humidity, particularly when ventilation is inadequate. Cockroaches, silverfish, ants, and other pests may be attracted to areas where moisture remains consistently available. Leaking pipes behind vanities or toilets can make conditions even more favorable. Because some leaks remain hidden, pest activity can occasionally be an early clue that excess moisture exists.

Reducing bathroom pest problems requires controlling moisture as well as limiting access. Plumbing leaks should be repaired promptly, and ventilation should be used to help reduce persistent humidity. Gaps around pipes and other wall penetrations can also be inspected and sealed where appropriate. Cabinets beneath sinks should remain reasonably organized so signs of pest activity are easier to notice. A clean, dry bathroom provides fewer resources for pests seeking shelter.

Are Basements and Crawl Spaces Vulnerable to Pests?

Basements and crawl spaces can be particularly vulnerable because they often provide darkness, moisture, and limited human activity. Spiders, insects, mice, rats, and other pests may find these conditions ideal for hiding or nesting. Foundation cracks, gaps around utility lines, damaged vents, and openings around windows can provide direct access from outdoors. Stored boxes and clutter can create additional protected spaces. Infestations may remain unnoticed for long periods when these areas are rarely inspected.

Moisture control is especially important in basements and crawl spaces. Plumbing leaks, poor drainage, condensation, or water intrusion can create conditions that support pest activity. Cardboard and other stored materials may also provide shelter and, in some cases, nesting material. Regular inspection can reveal droppings, damaged belongings, webs, insect activity, or gnaw marks before the problem spreads. Improving storage and addressing entry points can make these areas much less inviting.

What Makes Attics Attractive to Pests?

Attics offer warmth, shelter, and relatively little disturbance, making them attractive to rodents and certain insects. Mice and other animals may enter through gaps around rooflines, vents, utility penetrations, or damaged exterior materials. Once inside, insulation and stored belongings can provide nesting areas. Because homeowners may visit the attic only occasionally, pest populations can sometimes become established before anyone notices. Scratching or movement overhead may be one of the first warning signs.

Pest activity in an attic can also lead to property damage. Rodents may gnaw on stored items, insulation, wood, and wiring, while insects may establish nests in protected areas. Droppings and nesting materials are additional signs that should be investigated. Exterior openings should be inspected carefully because very small gaps can provide access for certain pests. Maintaining the roofline and attic ventilation components helps strengthen the home’s defenses.

Why Are Garages Common Pest Entry Points?

Garages frequently connect outdoor conditions directly with the interior of the home. Large doors open regularly, and gaps around door edges can allow insects and rodents to enter even when the garage is closed. Garages are also commonly used to store pet food, birdseed, garbage, cardboard boxes, and other materials that may attract pests. Clutter provides numerous hiding places where activity can go unnoticed. These conditions make garages important areas for pest prevention.

The door connecting an attached garage to the home deserves particular attention. Pests that establish themselves in the garage may eventually move into kitchens, walls, basements, or other living areas. Weatherstripping and door sweeps should be maintained so unnecessary gaps are minimized. Food products and animal feed should be stored in secure containers rather than open bags. Keeping the garage organized makes pest activity easier to detect and removes potential shelter.

Can Laundry and Utility Rooms Attract Pests?

Laundry and utility rooms can provide many of the same conditions pests seek in bathrooms and kitchens. Washing machines, utility sinks, water heaters, drains, and plumbing connections create multiple potential moisture sources. Small leaks may remain unnoticed behind appliances or inside cabinets. Warm equipment can also create sheltered environments that attract certain pests. Regular inspection is important because these areas often contain numerous hidden spaces.

Dryer vents and utility penetrations can also become potential entry points when exterior covers or seals are damaged. Openings around pipes, cables, and ducts should be checked for gaps that connect indoor spaces with walls or the exterior. Lint, stored materials, and clutter should not be allowed to accumulate unnecessarily. Maintaining accessible, clean utility areas makes inspections easier. Moisture control and exclusion work together to reduce pest risks.

Are Bedrooms and Living Areas Safe From Pests?

Bedrooms and living rooms may appear less vulnerable because they usually contain fewer food and water sources. However, pests can still reach these spaces through walls, floors, furniture, luggage, windows, and nearby rooms. Bed bugs, for example, can be introduced through belongings rather than entering because of poor sanitation. Ants and rodents may also travel through living areas while searching for food. Pest prevention therefore needs to extend beyond kitchens and utility spaces.

Clutter can make pest detection more difficult in bedrooms and living spaces. Piles of clothing, cardboard boxes, and rarely moved furniture create sheltered areas where signs may remain hidden. Regular vacuuming and inspection around baseboards, furniture, and storage areas can make unusual activity easier to spot. Cracks around windows and doors should also be addressed. Clean, organized living areas improve visibility and reduce potential hiding places.

How Does the Exterior of Your Home Contribute to Pest Problems?

Many indoor infestations begin outside the building. Overgrown shrubs, tree branches touching the structure, accumulated leaves, standing water, and poorly managed garbage can attract pests close to exterior walls. Once pests are near the building, they may discover openings around doors, windows, foundations, vents, and utility lines. Exterior pest prevention is therefore an important part of protecting interior spaces. Creating separation between pest habitats and the building can reduce opportunities for entry.

Water management around the foundation is particularly important. Clogged drainage systems, leaking outdoor faucets, and areas where water collects can provide moisture that attracts insects and other pests. Firewood, construction materials, and other stored items should also be managed so they do not create unnecessary shelter immediately against the home. Exterior walls should be periodically inspected for cracks and gaps. Preventing pests from reaching the building is often easier than eliminating them after they move inside.

How Can You Protect Pest-Prone Areas of Your Home?

Effective pest prevention begins with removing the resources pests need. Food should be stored securely, spills and crumbs should be cleaned promptly, and garbage should be managed consistently. Plumbing leaks and standing water should be corrected so pests have fewer dependable moisture sources. Clutter should also be reduced in storage areas such as garages, basements, and attics. These basic maintenance habits can make the home considerably less attractive to pests.

Exclusion provides another layer of protection by physically limiting pest access. Damaged screens, worn weatherstripping, foundation cracks, gaps around utility penetrations, and other openings should be inspected and corrected appropriately. Homeowners should also monitor vulnerable areas for droppings, nests, gnaw marks, insect activity, or unusual odors. When signs continue despite preventive measures, a professional pest inspection can help identify hidden activity. Combining sanitation, moisture control, exclusion, and monitoring provides stronger long-term protection than relying on treatment alone.

Final Thoughts

The areas of your home most vulnerable to pests are usually those that provide food, water, shelter, or easy access from outdoors. Kitchens and bathrooms offer dependable resources, while basements, crawl spaces, attics, garages, and utility rooms provide quiet hiding places where infestations may remain unnoticed. Bedrooms and living areas can also experience pest problems, particularly when pests are transported inside or travel from other parts of the structure. Regular cleaning, moisture control, proper food storage, exterior maintenance, and sealing entry points can significantly reduce these risks. By paying extra attention to vulnerable areas and responding quickly to warning signs, homeowners can make their properties less inviting to insects and rodents and prevent small pest problems from becoming established infestations.